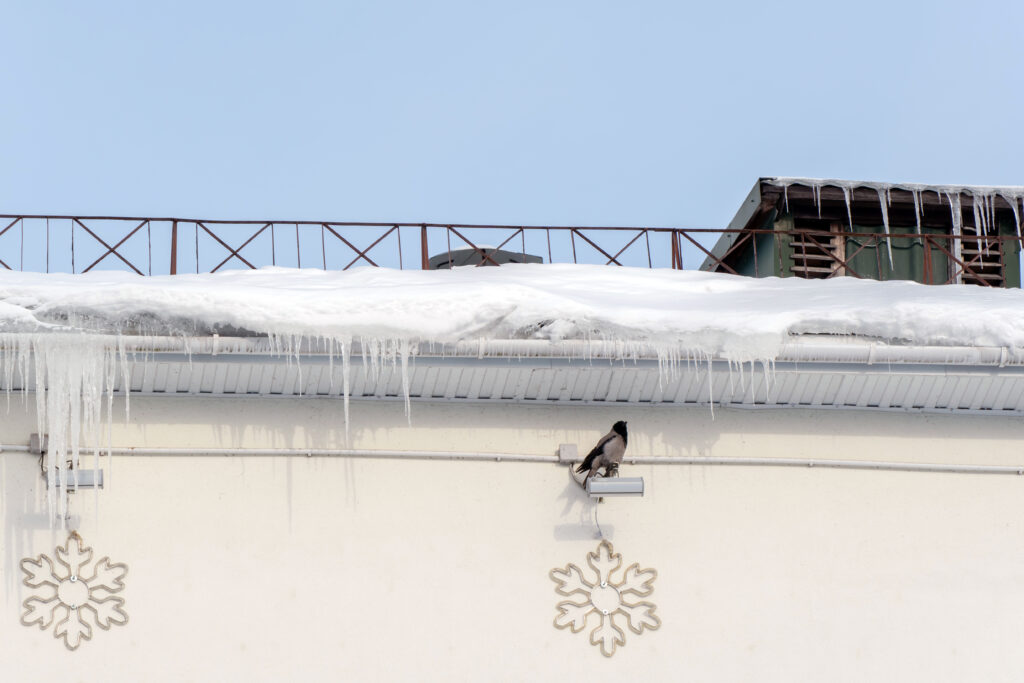
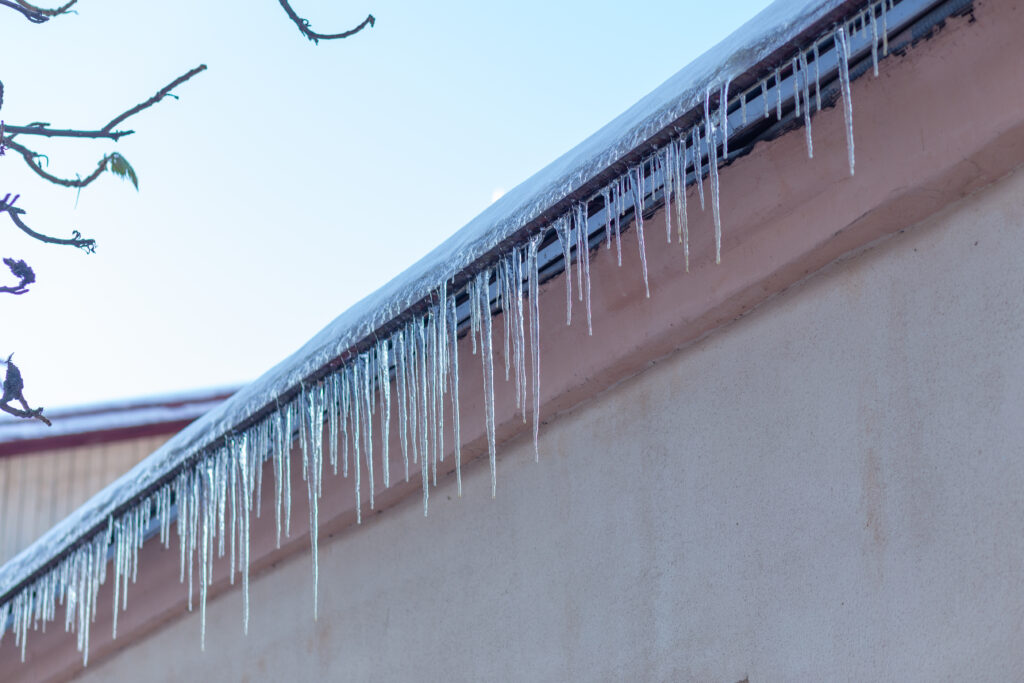
Are those picturesque icicles hanging from your gutters a sign of winter charm or a hidden warning of costly damage? A ridge of ice that forms at your roof’s edge is more than a seasonal nuisance. This barrier traps water from melting snow above it.
Heat escaping from your attic causes snow on the upper roof to melt. This water flows down to the colder eaves and refreezes, creating the dam. The trapped water then has nowhere to go. It can back up underneath your shingles and seep into your home’s structure. This leads to serious issues like soaked insulation, stained ceilings, and damaged walls. Left unchecked, it can foster mold growth.
Timely action is crucial to protect your property. This guide provides professional strategies for addressing the problem and implementing long-term solutions.
We will cover the root causes, safe techniques for eliminating them, and effective measures to stop them from forming in the first place.
What Is an Ice Dam and How Does It Cause Damage?
That accumulation of frozen material at your eaves can lead to water infiltration and costly repairs. This barrier forms when snow melts from the warmth in your attic space, making ice dam removal an essential process to consider.
The growing ridge blocks proper drainage from your roofing surface. More melting occurs behind this obstruction. Trapped liquid has nowhere to go but underneath your protective layers.
This seepage can compromise your home’s structure. It often leads to stained ceilings and soaked insulation. Mold growth and wood rot may follow if left unaddressed.
The Anatomy of a Damaging Ice Dam
Understanding how this problem develops helps with prevention.
The cycle begins with temperature differences across your roofing surface.
Warm air escaping from living spaces heats the underside of your roof deck. This warmth melts the snow blanket above. Liquid water flows downward toward the eaves.
Your roof’s overhang lacks interior heat sources. This area stays much colder than the main roof section. The flowing water refreezes at this cold edge.
A ridge builds gradually with each freeze-thaw cycle. Eventually, it becomes large enough to block drainage completely. The table below illustrates this destructive process:
| Stage | Process | Result |
| 1. Heat Escape | Warm air from attic melts snow on upper roof | Creates water flow toward colder edges |
| 2. Refreezing | Water reaches cold eaves and turns solid again | Forms initial frozen barrier |
| 3. Dam Growth | Cycle repeats, adding layers to the obstruction | Blockage prevents proper drainage |
| 4. Water Backup | Melting continues behind the solid ridge | Pooling liquid seeks entry points |
| 5. Infiltration | Water penetrates under shingles and through decking | Interior damage begins |
Once infiltration starts, problems multiply quickly. Water damages attic insulation, reducing its effectiveness. It can stain ceilings and promote mold in wall cavities.
Signs You Have an Ice Dam Problem
Early detection minimizes repair expenses. Look for both exterior and interior indicators of trouble.
Outside your home, watch for thick ridges along roof edges. These formations often appear after heavy snowfall. Large, persistent icicles may also signal blocked drainage.
Inside your property, check for moisture in the attic space. Water stains on ceilings or walls suggest seepage. Peeling paint or bulging drywall are later warning signs.
The following comparison helps identify potential issues:
| Exterior Signs | Interior Signs | Urgency Level |
| Thick ice ridge along eaves (over 1 inch) | Water stains on ceilings or walls | High – Address immediately |
| Large icicles forming repeatedly | Damp insulation in attic | High – Prevent further damage |
| Ice accumulation in roof valleys | Peeling paint or wallpaper | Medium – Schedule inspection |
| Snow melting unevenly on roof | Musty odors in upper rooms | Medium – Investigate source |
| Gutters completely blocked by ice | Visible drips or moisture in attic | Critical – Professional help needed |
Location variations matter for detection. Frozen barriers can form in roof valleys or near dormers. Complex roof designs create more potential trouble spots.
Persistent large icicles often indicate this issue. Icicles confined to gutters alone might not signal major problems. They can still be precursors to more serious formations.
Acting quickly protects your investment. Early intervention prevents extensive water damage. It also reduces the cost of necessary repairs significantly.
The Root Cause: Understanding the “Hot Attic” Theory
The “Hot Attic” theory explains the fundamental cause of winter roof formations. This problem starts with warmth escaping from your living spaces.
It is not primarily a gutter or roofing issue. Warm air leaking into the attic space creates the conditions for trouble.
This theory shifts focus from exterior symptoms to interior solutions. Addressing heat loss solves both the winter problem and improves energy efficiency.
How Heat Loss Melts Snow From Below
- Heat naturally rises through ceilings into your attic. This warmth transfers to the roof deck from underneath.
- The warmed deck then melts the bottom layer of snow accumulation. This happens even when outside temperatures stay below freezing.
- Water from melting snow flows down the sloped surface. It travels until reaching the colder, unheated eaves.
- At this cold edge, the liquid refreezes into a solid barrier. Each freeze-thaw cycle adds to the growing ridge.
- The same process that creates this formation also wastes energy. Your heating system works harder to replace lost warmth.
Common Sources of Attic Heat and Air Leaks
Any penetration into the attic space can allow warm air passage. These leaks are often small but collectively significant.
- Inadequate or compressed insulation also contributes greatly. It allows heat transfer through conduction rather than blocking it.
- Thermal bridging occurs where framing members conduct warmth.
- Wood studs and rafters transfer heat more readily than insulation material.
Proper attic ventilation helps remove some accumulated heat. However, ventilation alone cannot solve air leakage problems.
Sealing these leaks addresses the root cause effectively. The table below details common trouble spots and their impacts:
| Leak Source | How It Contributes | Prevention Strategy |
| Recessed Light Fixtures | Direct conduit for warm air from rooms below; creates hot spots on roof deck | Install airtight, IC-rated fixtures or build sealed enclosures |
| Plumbing & Electrical Penetrations | Gaps around pipes, wires, and vents allow air movement; often overlooked | Seal with spray foam or caulk from both attic and interior sides |
| Attic Hatch or Door | Poor sealing and minimal insulation; acts as direct opening to conditioned space | Add weatherstripping and insulate the back with rigid foam board |
| Chimney Chase & Flues | Large openings around masonry; significant heat loss area | Install metal flashing sealed with high-temperature caulk |
| Top Plate Gaps | Spaces where walls meet attic floor; allows air flow along interior walls | Apply caulk or foam along entire perimeter where drywall meets top plate |
| Ductwork in Attic | Leaky supply ducts or return air pathways heat the attic space directly | Seal duct joints with mastic tape and ensure proper insulation around ducts |
Identifying these sources requires careful inspection. Look for daylight around penetrations or feel for air movement.
Dust patterns on insulation often reveal air pathways. These trails show where air flows from below. The energy implications are substantial. The same heat loss that causes winter formations increases heating costs.
Solving the “hot attic” problem delivers dual benefits. It protects your roof structure while improving home comfort. This approach creates a comprehensive prevention strategy. It addresses the issue at its source rather than just the symptoms.
Safe vs. Dangerous Ice Dam Removal Methods
Addressing a frozen obstruction on your roofing requires careful consideration of both safety and material compatibility. The technique you choose impacts your home’s protection and your personal well-being.
Some approaches effectively clear the blockage without harming your structure. Others can cause significant damage to shingles, gutters, and underlying decking.
This section compares proven strategies with risky practices. Understanding these differences helps you make an informed decision for your property.
The Safe, DIY Calcium Chloride Method
A homeowner can tackle a moderate frozen ridge with a specific, safe material. Calcium chloride offers an effective solution available at hardware stores.
This compound melts frozen material at lower temperatures than rock alternatives. It works without corroding metal components or harming most roofing surfaces. The process involves creating a melting channel through the solid buildup.
Follow these steps for proper application:
- Clear the area: Use a roof rake to pull snow back 3-4 feet from the edge. This prevents new meltwater from adding to the problem.
- Prepare the applicator: Fill a nylon stocking or tube sock with calcium chloride pellets. Tie the end securely to create a long, flexible “sock.”
- Position the sock: Lay the filled stocking vertically across the frozen ridge. Place it perpendicular to your gutter line to create a drainage channel.
- Protect landscaping: Place plywood or boards under the downspout area. This directs the salty runoff away from plants and shrubs.
The calcium chloride will gradually melt a path through the obstruction. This allows trapped water to drain off the roof surface safely.
Always check the product label to ensure it’s pure calcium chloride. Avoid mixes containing sodium chloride, which damages roofing materials.
Professional Steam Removal: The Gold Standard
For significant buildup or difficult roof access, hire a specialized contractor. Professional steam clearance represents the most effective approach.
Trained technicians use industrial-grade steam generators mounted on trucks. The equipment produces high-temperature, low-pressure vapor.
This vapor cuts through frozen material without force or impact. The process preserves shingle integrity while creating immediate drainage channels.
A typical service takes 2-3 hours for an average residential roof. Costs generally range from $400 to $600 per hour, depending on location and complexity.
The advantages of this method are substantial:
- No physical damage: Steam melts the obstruction without scraping or chipping surfaces.
- Immediate results: Water flow restores quickly, preventing further interior seepage.
- Enhanced safety: Professionals have proper equipment and training for working at heights in winter conditions.
- Clean operation: The process leaves minimal residue compared to chemical alternatives.
Many roofing companies and specialized winter services offer this solution. Verify the contractor carries appropriate insurance and has specific experience with steam equipment.
Methods to Avoid: Chipping, Salt, and Pressure Washing
Certain common approaches create more problems than they solve. These techniques often lead to costly repairs and void roofing warranties.
| Method | Why It’s Problematic | Potential Consequences |
| Chipping with Tools | Using hammers, chisels, or ice picks applies direct impact force to frozen material and roofing surface. | Cracked or broken shingles; punctured roof deck; compromised waterproofing layers; personal injury risk from falling ice or tools. |
| Rock Salt Application | Sodium chloride (rock salt) is highly corrosive and damages multiple materials. | Corroded metal gutters and flashing; degraded asphalt shingles; harmed plants and soil from runoff; stained siding and walkways. |
| Pressure Washing | High-pressure hot water can force liquid underneath protective layers. | Water infiltration under shingles; damaged roofing granules; loosened sealant strips; potential for immediate interior leaks. |
| Heating Cables | Electrical cables installed along eaves provide only temporary, localized melting. | Increased energy costs; shortened shingle life from thermal cycling; does not address root attic heat issues; can create fire hazards if improperly installed. |
Each problematic method addresses the symptom rather than the cause. They may provide temporary visual clearance while creating long-term structural issues.
Ladder use on icy surfaces presents serious fall hazards. If your roof isn’t safely accessible from the ground, professional assistance is the wisest choice.
Prioritize techniques that protect your roofing investment. The right approach solves the immediate problem while preserving your home’s exterior integrity.
Long-Term Ice Dam Prevention Strategy
Effective prevention of seasonal roof issues requires a systematic strategy focused on your home’s thermal envelope. This approach targets the root cause rather than temporary fixes. It creates lasting protection against water infiltration and structural damage.
The three-step method involves air sealing, insulation upgrading, and ventilation balancing. Together, these measures stop heat from reaching your roof deck. Implementing this strategy offers additional benefits. You’ll see lower heating costs and improved comfort throughout your home.
Step 1: Air Sealing Your Attic
Air sealing blocks the pathways where warm air escapes into your attic space. This is the most critical step in prevention.
Identify all penetrations between living areas and the attic. Common trouble spots include light fixtures, plumbing vents, and electrical wires.
Use appropriate materials for each gap size. Caulk works well for small cracks under half an inch wide.
Expanding spray foam seals larger openings around pipes and ducts. Install baffles to maintain proper airflow from soffit vents.
A professional energy assessment provides the best results. Technicians use infrared cameras to pinpoint hidden air leaks.
| Sealing Location | Recommended Material | Special Considerations |
| Small gaps around wires | High-quality silicone caulk | Apply from both attic and interior sides for complete seal |
| Plumbing vent penetrations | Fire-rated expanding foam | Allow proper expansion space; trim excess after curing |
| Recessed light fixtures | IC-rated airtight enclosures | Never cover non-IC rated fixtures with insulation |
| Attic hatch or door | Weatherstripping and rigid foam | Ensure easy operation after adding insulation and seal |
Step 2: Upgrading Attic Insulation
Proper insulation reduces heat transfer from your living spaces. It works with air sealing to maintain consistent temperatures.
Aim for minimum R-50 insulation value in your attic. This thermal resistance level effectively blocks heat flow.
Blown-in cellulose or fiberglass often provides the best coverage. These materials fill irregular spaces completely.
Uniform depth is crucial for performance. Measure insulation thickness throughout the entire attic floor.
Existing insulation may need leveling before adding more. Compressed material loses its effectiveness significantly.
Consider these insulation options for your project:
- Blown-in cellulose: Made from recycled paper; provides good air sealing properties
- Fiberglass batts: Pre-cut sections; require careful installation to avoid gaps
- Spray foam: High R-value per inch; provides both insulation and air sealing
- Mineral wool: Fire-resistant and moisture tolerant; excellent soundproofing
Step 3: Ensuring Proper Attic Ventilation
Ventilation alone cannot prevent winter roof formations. It must work with air sealing and insulation for best results. A balanced system removes excess heat and moisture. This helps maintain consistent roof deck temperatures.
Soffit vents provide fresh air intake along the eaves. Ridge vents allow warm air to exit at the roof’s peak.
The ratio between intake and exhaust vents matters greatly. Improper balance can create new problems.
Avoid adding roof vents without professional assessment. They often worsen existing issues rather than solving them.
Proper ventilation offers multiple benefits for your home:
- Reduces summer cooling costs by removing hot air
- Prevents moisture buildup that can damage wood structures
- Extends the life of roofing materials by reducing thermal stress
- Improves overall indoor air quality throughout your home
- Professional installation ensures maximum effectiveness. Experts understand local building codes and climate considerations.
- This comprehensive strategy protects your investment year-round. It addresses the source of heat loss completely. You’ll enjoy lower energy bills and enhanced home comfort. The initial investment pays back through reduced heating costs.
Schedule an energy audit with a qualified contractor. They’ll create a customized plan for your specific home.
When to Call a Professional: Costs and Considerations
Understanding the 2026 pricing landscape for specialized winter services helps homeowners make informed decisions about when to seek professional assistance.
Certain situations clearly indicate the need for expert intervention. Attempting do-it-yourself methods on steep or high roofs creates serious safety risks.
Extensive frozen buildup that covers large sections of your eaves also warrants professional help. If water has already begun leaking into your attic or living spaces, immediate expert response is essential.
Hiring a specialist prevents further structural compromise. It also ensures the job gets done correctly without damaging your roofing materials.
Factors That Influence Ice Dam Removal Cost
Multiple variables determine the final price for professional winter roof services.
- The extent of frozen accumulation plays the most significant role.
- A thick, widespread ridge requires more time and resources to address.
- The size and pitch of your roof directly affect labor hours needed.
- Steeper roofs demand specialized safety equipment and additional crew members.
- Accessibility challenges, like limited yard space or overhead obstructions, can increase expenses.
- Geographic location influences regional pricing averages. Urban areas with higher operating costs typically charge more than rural regions.
- Emergency response times also impact service fees. Expedited weekend or holiday calls often carry premium rates.
The table below details how different factors affect 2026 pricing estimates:
| Cost Factor | Low Impact Scenario | High Impact Scenario | Estimated Price Difference |
| Amount of Buildup | Thin ridge under 2 inches along eaves | Thick accumulation over 6 inches covering entire perimeter | +$800 to +$1,500 |
| Roof Size & Pitch | Single-story ranch with low slope | Two-story colonial with steep 8/12 pitch | +$400 to +$900 |
| Accessibility | Clear ground access, standard ladder setup | Limited space requiring specialized lift equipment | +$300 to +$700 |
| Geographic Location | Midwest suburban area | Northeast metropolitan region | +$200 to +$500 |
| Response Time | Scheduled weekday appointment | Emergency weekend service call | +$150 to +$400 |
Equipment choice represents another major cost determinant. Steam elimination stands as the most effective but priciest method.
This approach uses specialized generators to melt channels through frozen material. It preserves shingle integrity while creating immediate drainage.
Alternative techniques vary in both effectiveness and price. Chemical applications and mechanical chipping offer lower upfront costs but may cause material damage.
What to Expect from a Professional Removal Service
Reputable contractors follow a systematic approach to winter roof problems. They begin with a thorough assessment of your specific situation.
- This evaluation examines the extent of frozen buildup and identifies potential entry points for water. Professionals check for existing interior damage in your attic space.
- The service team explains their recommended method and provides a detailed cost estimate. They outline safety protocols for both their crew and your property.
- Proper equipment usage distinguishes professional work from amateur attempts. Steam generators mounted on service trucks deliver controlled, low-pressure vapor.
- This vapor cuts through obstructions without force or scraping. Technicians create strategic drainage channels rather than attempting complete clearance.
- Safety remains paramount throughout the process. Crews use fall protection systems and secure work areas around your home.
- After completing the elimination work, professionals inspect for any immediate water flow. They may recommend temporary measures to prevent recurrence until permanent solutions get implemented.
- Choosing the right contractor requires careful verification. Always select licensed and insured specialists with specific experience in winter roof services.
- Request references from previous clients with similar home types. Verify that the company carries both liability insurance and workers’ compensation coverage.
- Some homeowners policies may cover professional service costs when preventing imminent damage. Check your specific policy details before scheduling work.
- Document the situation with photographs before the crew arrives. This evidence supports any insurance claims you might need to file later.
How much does professional ice dam removal cost in 2026?
- National averages for professional winter roof services range from $400 to $4,000 in 2026. The typical project costs approximately $1,200 for complete elimination.
- Chicago-area specialists charge around $1,200 on average for standard residential jobs. Regional differences reflect local labor rates and seasonal demand variations.
- Service method significantly affects final pricing. Steam elimination represents the premium option at $400-$600 per hour.
- Chemical applications using calcium chloride or specialized melt tablets cost $100-$150 hourly. Mechanical chipping services range from $200-$300 per hour.
- Pressure washing services fall between $200-$400 hourly. Remember that cheaper methods may lead to higher repair costs from material damage.
- Consider professional service expenses as an investment in protecting your home. The average $1,200 service cost compares favorably against potential water damage repairs.
- Interior repairs for ceiling, wall, and insulation damage often exceed $5,000. Structural repairs to roof decking and framing can reach $10,000 or more.
- Mold remediation adds another $2,000-$6,000 to repair bills. Professional elimination prevents these substantially higher expenses.
Conclusion: Protecting Your Home Year-Round
Your most powerful strategy against costly winter damage is a proactive, year-round approach to home maintenance.
Remember, these formations start with attic heat loss. Safe clearing methods like calcium chloride address the symptom, but sealing air leaks and upgrading insulation solve the root cause.
“Homeowners insurance may cover professional service if it prevents imminent water damage, but always check your policy.”
Never use a pressure washer, as it forces moisture under shingles. Gutter guards are ineffective because the problem originates on the roof surface.
Prioritize safety and invest in long-term prevention. Schedule an energy assessment with a qualified contractor to protect your home in all seasons.
FAQ
What are the immediate signs that I need to address a snow roof issue?
Look for large icicles hanging from your eaves and visible ridges of frozen material along the gutter line. Inside, check for water stains or moisture on walls and ceilings, especially after a thaw, which indicate melting snow is leaking in.
How does attic insulation prevent winter water damage?
Proper insulation keeps warm air from your living space from escaping into the attic. This stops the underside of your roof from getting warm, which prevents snow from melting and refreezing at the eaves, a primary cause of leaks.
Is using rock salt or a pressure washer a good way to clear my gutters?
No, these are dangerous methods. Rock salt can corrode metal and damage landscaping, while a pressure washer can destroy shingles and force water under them. For a safe DIY approach, use calcium chloride in a stocking.
What does a professional contractor do that is different from DIY?
Experts use specialized steam equipment to melt channels through the frozen blockage without any physical contact. This protects your roofing material from harm and immediately stops water from backing up under the shingles.
Why is attic ventilation a key part of a long-term strategy?
Balanced ventilation allows cold air to flow, keeping the entire roof deck uniformly cool. This, combined with air sealing and adequate insulation, solves the “hot attic” problem that leads to melting and refreezing cycles.
What factors influence the price of a professional service in 2026?
Costs depend on the home’s size, roof pitch, severity of the blockage, and accessibility. Investing in proper attic insulation and air sealing upfront can reduce long-term energy expenses and prevent recurring issues.